For many of us, a morning coffee or a plate of pasta with red sauce is non-negotiable. But when you have braces, these simple pleasures can leave behind an unwelcome reminder: yellowed elastic bands. It’s a common dilemma for anyone undergoing orthodontic treatment. You want to live your life and enjoy your food, but you also want your smile to look its best. You don’t have to choose between the two. This guide is for the foodies, the coffee lovers, and everyone in between. We’ll show you how to remove yellow stains from braces bands with simple at-home methods and share smart tips for enjoying your favorites without worry.
Key Takeaways
- Your daily habits are your best defense: A consistent routine of brushing after meals, daily flossing, and using an interdental brush is the most effective way to prevent the plaque buildup and food particles that cause yellowing.
- Be mindful of what you consume: Darkly pigmented foods and drinks like coffee, curry, and tomato sauce are the primary culprits for stains. You can minimize their effect by rinsing with water immediately after you eat or using a straw for beverages.
- Don’t stress—the fix is simple: The yellowing is almost always on the elastic bands, not your brackets. These are replaced at every adjustment, but if stains bother you, your orthodontist can easily swap them out or perform a professional cleaning.
Why Do My Braces Bands Look Yellow?
Ever glance in the mirror and notice your once-bright braces bands have taken on a yellowish tint? It’s a common experience, and thankfully, it’s usually something you can manage. The elastic ligatures on your braces are porous, which means they can easily absorb pigments from what you eat and drink. Think of them like a white t-shirt—prone to staining, but not impossible to keep clean.
The main reasons for discoloration are the foods and drinks you consume, along with your daily oral hygiene habits. Understanding exactly what causes the staining is the first step toward keeping your smile bright throughout your treatment. Let’s break down the common culprits so you can keep your bands looking fresh until your next appointment.
Understand What Causes Stains
The primary reason your braces bands turn yellow is staining from external sources. The two biggest offenders are chromogens—highly pigmented molecules found in certain foods and drinks—and plaque buildup. Plaque is a sticky, yellowish film of bacteria that constantly forms on your teeth and braces. If not cleaned away properly, it can accumulate on and around your brackets and bands, causing them to look discolored. The elastic material itself is susceptible to absorbing these colors, so what you expose your braces to really matters. Keeping up with your orthodontics care plan is key to minimizing these effects and ensuring your treatment stays on track.
How Food and Drinks Affect Your Bands
You’ve probably heard that coffee and red wine can stain your teeth, and the same is true for your braces bands. Dark-colored foods and drinks are packed with strong pigments that cling to the elastics. The most common culprits include coffee, tea, dark sodas, and red wine. Foods like curry, tomato sauce, mustard, berries, and beets are also known to cause significant staining. You don’t necessarily have to cut these items out of your diet completely, but being mindful of how often you consume them can make a big difference. Rinsing your mouth with water after eating or drinking something colorful can help wash away the pigments before they have a chance to set in.
The Role of Your Oral Hygiene Routine
Your daily cleaning habits play a huge role in the color of your braces bands. When you don’t brush and floss effectively, food particles get trapped and plaque starts to build up. Since plaque has a natural yellow hue, it will make your bands appear dingy over time. A consistent and thorough oral hygiene routine is your best defense against staining. Brushing after every meal and flossing daily removes the plaque and food debris before they can discolor your elastics. These habits are the foundation of good general dentistry and are even more critical when you have braces. A clean mouth means brighter bands and healthier teeth and gums.
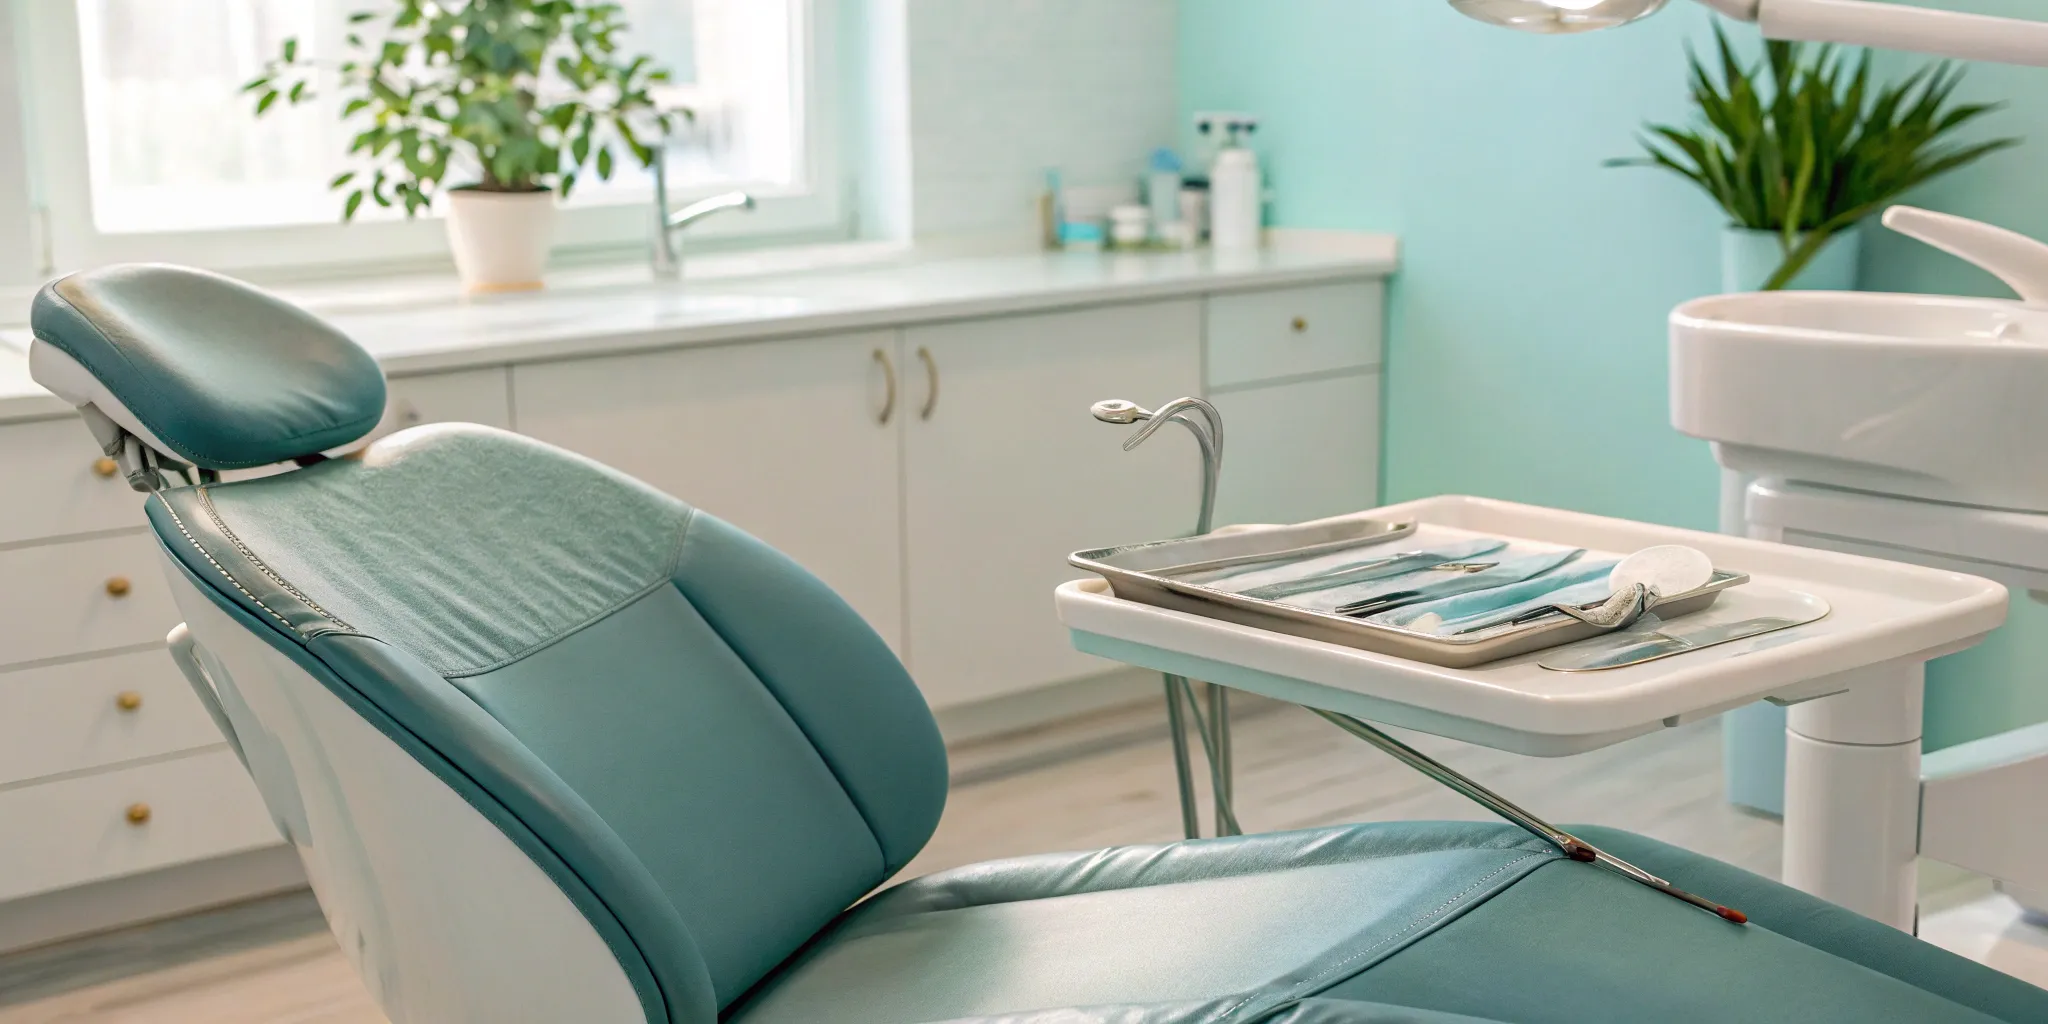
How to Whiten Stained Braces Bands at Home
If you’ve noticed your braces bands looking a little less vibrant, don’t worry—it happens to the best of us. While you can’t always get them back to their original pristine color, there are a few safe at-home methods you can try to reduce yellowing between appointments. Think of these as maintenance tips to keep your smile looking its best. Remember, the goal is to be gentle with both your braces and your teeth. Aggressive scrubbing or harsh chemicals are never the answer. Before you try anything new, it’s always a smart idea to check in with your dental team.
Try a Baking Soda Paste
A simple baking soda paste can be a gentle and effective way to lift surface stains from your bands. Just mix a small amount of baking soda with a bit of water until you have a paste-like consistency. Using a soft-bristled toothbrush, gently apply the paste to your stained bands and brush in small, circular motions. Let it sit for a minute or two before rinsing your mouth thoroughly with water. Baking soda is mildly abrasive, which helps polish away stains without being too harsh. It’s a classic household remedy for a reason, but always use a light touch to protect your enamel and orthodontic hardware.
Use Hydrogen Peroxide Safely
Hydrogen peroxide is known for its whitening properties, but it’s crucial to use it correctly and with caution. You can create a rinse by mixing one part 3% hydrogen peroxide with two parts water. Swish the solution in your mouth for about 30 seconds, making sure it reaches your braces, and then spit it out completely. It is essential that you ask your orthodontist before trying this method. They can confirm if it’s a safe option for you and your specific treatment plan. Your dental health is the top priority, so getting professional advice from our orthodontics team ensures you’re not doing anything that could interfere with your progress.
Choose the Right Cleaning Products
The products you use every day play a huge role in keeping your bands clean. Opt for an alcohol-free mouthwash and try rinsing with it a few times a day, especially after meals. Swishing for at least a minute can help dislodge food particles and break down fresh stains before they set. When it comes to toothpaste, stick with a non-whitening, fluoride formula. Some whitening toothpastes contain abrasive ingredients that can scratch your bands or damage the bonding material holding your brackets in place. Consistent, high-quality general dentistry habits are your best defense against discoloration.
Explore Natural Whitening Options
You can also support a brighter smile with a few simple, natural habits. Chewing sugar-free gum after meals is a great way to stimulate saliva production. Saliva is your body’s natural cleaning agent, helping to rinse away food debris and acids that can cause staining. Another easy tip is to drink plenty of water throughout the day. Sipping water while you eat and rinsing with it afterward can wash away stain-causing particles from dark foods and drinks. These small actions won’t produce dramatic whitening results overnight, but they contribute significantly to your overall oral hygiene and help keep your bands looking fresher for longer.
What to Avoid When Cleaning Your Bands
Knowing what not to do is just as important as knowing what to do. Steer clear of highly acidic substances like lemon juice or apple cider vinegar. While they might seem like a natural way to remove stains, their high acid content can erode your tooth enamel, leading to permanent damage. You should also avoid any DIY whitening concoctions that involve activated charcoal, which is too abrasive for both your teeth and your braces. The key is to protect your smile for the long term. Stick to approved products and gentle techniques to ensure your teeth stay healthy and strong throughout your orthodontic journey.
Your Daily Guide to Preventing Stains
The best way to deal with yellow stains is to stop them from happening in the first place. Building a solid daily routine is your strongest defense against discoloration. It might seem like a lot at first, but once you get the hang of it, these simple habits will become second nature. Think of it as an investment in your smile—a little effort each day pays off with bright, clean braces until your next adjustment. This routine isn’t just about looks; it’s about maintaining excellent oral health throughout your orthodontic treatment.
Brush Your Teeth the Right Way
Brushing with braces requires a bit more attention to detail. Your goal is to clean your teeth and the hardware. After every meal, use a soft-bristled toothbrush and fluoride toothpaste to gently brush. Angle your brush at 45 degrees to clean above and below the brackets, making sure you reach the tooth surface underneath the wires. Pay special attention to the elastic bands, as they are magnets for plaque and food particles. Being thorough is more important than brushing hard, which can damage your gums and braces. A consistent and careful approach is the key to keeping everything clean and stain-free.
Master Flossing with Braces
Yes, you still have to floss! It’s non-negotiable for preventing stains and cavities between your teeth. Flossing with braces can be tricky, but tools like a floss threader or orthodontic flosser can make it much easier. A water flosser is also a fantastic tool for dislodging food particles from around your brackets. Take your time to guide the floss between each tooth, going gently below the gumline. Daily flossing removes the plaque and food debris that your toothbrush can’t reach, which are major culprits for staining both your teeth and your brace bands.
Use Interdental Brushes Effectively
An interdental brush, sometimes called a proxy brush, is your secret weapon for cleaning the tightest spots. This tiny brush is designed to fit into small spaces, like between your brackets and under the archwire. Use it to scrub away any plaque or food bits that your regular toothbrush missed. It’s perfect for a quick clean-up after a snack when you don’t have time for a full brushing session. Keeping one in your bag or backpack ensures you can tackle potential stains no matter where you are, keeping your smile bright throughout the day.
What to Do After You Eat
If you can’t brush your teeth immediately after a meal or snack, don’t worry. The next best thing is to rinse your mouth vigorously with water. Swishing water around for about 30 seconds helps wash away food particles and drink residue before they have a chance to settle on your braces and bands. This simple step can significantly reduce the staining potential of colorful foods and drinks. It’s a quick, easy habit that makes a huge difference in maintaining the color of your bands and the overall health of your mouth.
Rinse with the Right Mouthwash
Finishing your routine with a mouthwash can help kill bacteria and keep your breath fresh, but be sure to choose the right one. Opt for a clear, alcohol-free, antiseptic mouthwash. Why clear? Because brightly colored mouthwashes (like blue or green ones) contain dyes that can stain your clear or light-colored elastic bands over time. An alcohol-free formula is also gentler on your mouth’s soft tissues. Rinsing once a day can complement your brushing and flossing, contributing to a healthier, brighter smile and supporting your cosmetic dentistry goals.
Foods and Drinks That Stain Braces
What you eat and drink has a big impact on the color of your braces bands. The porous material of the elastics can easily absorb pigments from certain foods and beverages, leading to that yellow or dingy look. The good news is that you don’t have to completely overhaul your diet. Just being mindful of the main culprits can make a huge difference in keeping your smile bright throughout your treatment. Think of it less as a list of rules and more as a guide to making smart choices for your smile.
Foods to Watch Out For
Certain foods are packed with strong pigments that love to cling to braces bands. Think of vibrant spices like turmeric and curry, which can turn your elastics yellow almost instantly. Darkly colored fruits and vegetables, such as berries, pomegranates, and beets, can also leave their mark. Even everyday condiments like yellow mustard, soy sauce, and balsamic vinegar can cause discoloration. Tomato-based products, from pasta sauce to ketchup, are also known offenders. You don’t have to avoid these foods entirely, but it’s helpful to know which ones require a little extra cleaning effort afterward.
Drinks That Discolor Bands
Just like with food, some of our favorite drinks are notorious for staining. Coffee and black tea are two of the biggest culprits, as their dark pigments can quickly dull the color of your bands. Red wine is another one to watch out for. It’s not just about the color, either; dark sodas and other sugary drinks can contribute to staining and are also not great for your overall oral health. Being aware of which beverages are more likely to cause stains can help you make choices that keep your braces looking their best between appointments.
Smart Swaps for a Brighter Smile
Making small changes to your diet can go a long way in preventing stains. If you love pasta, try swapping a red tomato sauce for a pesto or an olive oil-based sauce. Instead of a dark berry smoothie, maybe opt for one made with mango and pineapple. Choosing light-colored or clear drinks over dark ones, like water or light-colored sodas instead of colas and coffee, can also make a noticeable difference. These simple swaps help you enjoy your meals without worrying as much about discoloration, making your orthodontics journey a little easier.
Tips for Sipping Smarter
You can still enjoy your favorite drinks with a few simple tricks. When you’re drinking something that could stain, like iced coffee or tea, use a straw. This helps the liquid bypass your front teeth and braces, minimizing direct contact and reducing the chance of staining. After you finish a meal or a colorful drink, make it a habit to rinse your mouth thoroughly with water. This simple step washes away staining particles before they have a chance to settle. Then, brush your teeth as soon as you can to keep your smile and your general dentistry check-ups in great shape.
When to Get Professional Help
While at-home care is your first line of defense against yellowing braces bands, some situations call for a professional. Trying to fix stubborn stains with harsh methods can damage your braces or your teeth, so it’s always better to ask for help when you need it. Your dental team has the right tools and expertise to safely manage stains and keep your treatment on track. Think of them as your partners in achieving a healthy, beautiful smile. If you’ve tried everything at home and aren’t seeing results, or if you’re worried about the health of your teeth, it’s time to make a call. A quick visit can solve the problem and give you peace of mind.
Know When to Call Your Orthodontist
If you’re feeling frustrated with stained bands, your first and best move is to contact your orthodontist. Instead of guessing or trying aggressive cleaning methods, a simple phone call can provide a clear solution. Your orthodontics team knows your specific treatment plan and can offer personalized advice. They might suggest a particular cleaning technique you haven’t tried or recommend a product that’s safe for your braces. In some cases, they may even be able to clean the stains for you during a brief office visit. Don’t hesitate to reach out—they’ve seen it all before and are there to help you keep your smile looking its best throughout your treatment.
Ask About Professional Cleaning
Sometimes, stains are a sign of something more than just colorful foods. They can be linked to plaque and tartar buildup that your toothbrush can’t remove on its own. A professional dental cleaning is the most effective way to tackle this. Your hygienist uses specialized tools, like ultrasonic scalers, to gently and thoroughly remove stubborn plaque and surface stains from both your teeth and brackets. This not only improves the appearance of your braces but also protects your underlying tooth enamel from decay. Scheduling regular cleanings is a crucial part of maintaining your oral health while wearing braces, ensuring your teeth stay strong and healthy underneath the hardware.
Learn About Band Replacement
Here’s some good news: if you have clear or ceramic braces, it’s probably not the brackets that are stained. The ceramic material is designed to be stain-resistant. The yellowing you see is almost always in the tiny elastic bands, or “ligatures,” that hold the archwire to your brackets. These bands are porous and easily absorb pigments from food and drinks. The best part? These bands are replaced at every single adjustment appointment. If the staining is really bothering you between visits, you can always call your orthodontist and ask to have them swapped out. It’s a quick, easy fix that instantly brightens your smile.
Warning Signs You Shouldn’t Ignore
While often just a cosmetic issue, stained bands can sometimes point to bigger problems. Heavy staining can create a sticky surface that encourages bacteria to grow, which may lead to cavities, gum inflammation, or bad breath. If you notice that plaque is building up around your brackets and is difficult to remove, it’s a sign you need professional help. Discoloration can also indicate that your oral hygiene routine needs some adjustments to be more effective. Ignoring these signs can compromise your oral health and potentially interfere with how well your braces work, so it’s important to address them with your dental team right away.
Your Toolkit for Stain-Free Braces
Keeping your braces clean and bright doesn’t require a complicated setup. It’s all about having the right tools and habits in place. Think of it as creating a simple, effective system that works for you, whether you’re at home or on the move. A little preparation goes a long way in preventing stains and keeping your smile looking its best throughout your treatment. Let’s put together your go-to kit and a solid plan to keep those bands looking fresh.
The Best Tools for Cleaning Braces
Your bathroom counter should have a few key items to make cleaning around your braces a breeze. Start with a soft-bristled toothbrush and a good fluoride toothpaste. You’ll want to brush after every meal to clear away food particles before they have a chance to stain. An interdental brush is another must-have. This tiny tool is specifically designed to get into the tight spots around your brackets and under the wires that your regular toothbrush might miss. Daily flossing is also non-negotiable, so make sure you have floss threaders or orthodontic floss to make the job easier. These tools are your first line of defense in maintaining great general dentistry habits while you have braces.
Build a Braces Care Kit for Travel
Life happens outside your home, so a portable care kit is essential for keeping your braces clean on the go. Find a small pouch and stock it with travel-sized versions of your essentials: a toothbrush, toothpaste, and an interdental brush. It’s also smart to pack a reusable straw. When you’re out and want to enjoy a soda or iced tea, using a straw helps the liquid bypass your front teeth and bands, reducing direct contact and the risk of staining. Having this kit ready to toss in your bag means you can easily freshen up after lunch at work or a snack with friends, keeping your oral hygiene on track no matter where you are.
Handle Stains on the Go
What do you do if you’ve just had a meal and notice a bit of color on your bands? Don’t panic. The simplest and most immediate action is to rinse your mouth thoroughly with water. Swishing water around can wash away food particles and pigments before they set in. If you have your travel kit with you, a quick brush with fluoride toothpaste will usually take care of minor surface stains. For a tougher spot, you can create a simple paste by mixing a little baking soda with water. Apply it gently to the stained area with your toothbrush, brush lightly, and rinse well. This can be a great quick fix until your next deep clean.
Create a Long-Term Prevention Plan
The best way to deal with stains is to prevent them from happening in the first place. A solid long-term strategy involves being mindful of what you eat and drink. Try to limit your intake of known stain-culprits like coffee, tea, red wine, and dark sauces. When you do indulge, make it a point to rinse or brush soon after. Most importantly, stick to your scheduled appointments. Regular visits to your orthodontist are crucial because they include professional cleanings that can remove tough plaque and stains you can’t tackle alone. These check-ins are a core part of your orthodontics journey and ensure everything is progressing as it should.
Related Articles
Frequently Asked Questions
Can I just use whitening toothpaste to clean my stained bands? It’s actually better to stick with a regular, non-whitening fluoride toothpaste. Many whitening formulas contain abrasive ingredients that can be too rough on your braces. These particles can scratch the elastic bands or even weaken the bonding material that keeps your brackets attached to your teeth. A consistent cleaning routine with a soft-bristled brush is a much safer bet.
Are some colors for braces bands better at hiding stains than others? Yes, the color you pick can make a big difference. Clear, white, and very light pastel colors tend to show stains the most, especially from things like coffee or tomato sauce. If you’re concerned about yellowing, you might want to choose darker colors like gray, navy blue, or even black at your next appointment. These shades are great at camouflaging discoloration.
How can I tell if it’s my bracket or the band that’s stained? If you have ceramic or “clear” braces, the discoloration you’re seeing is almost always on the elastic band, not the bracket itself. The ceramic material is designed to be highly stain-resistant. The tiny elastic bands, on the other hand, are porous and easily absorb pigments from what you eat and drink.
If I’m short on time, what’s the most important thing I can do to prevent stains? The single most effective habit is to rinse your mouth vigorously with water right after you eat or drink. Swishing for about 30 seconds helps wash away food particles and colorful residues before they have a chance to settle on your bands. It’s a simple action that makes a huge difference in keeping your braces looking bright.
How often do I get new bands anyway? You get a brand new set of elastic bands at every single adjustment appointment with your orthodontist. These visits are typically scheduled every four to eight weeks. So, even if your bands do get a little dingy, you can rest assured that a fresh, clean start is just around the corner.