Let’s be honest: looking at a dental treatment plan can feel like trying to decipher a secret message. All those numbers and letters are a language of their own, and when you’re considering a significant restoration like an implant bridge, you want to understand exactly what’s happening. This is where dental codes come in. They are the universal language dentists use to communicate with your insurance provider, ensuring every detail of your care is accurately documented. Understanding the specific screw retained implant bridge codes is the key to making sense of your treatment plan, your bill, and your insurance coverage, empowering you to ask the right questions and feel confident in your care.
Key Takeaways
- Your Bridge is Built for Stability and Maintenance: A screw-retained bridge is a secure, long-term solution for missing teeth that’s anchored directly to dental implants. Its key advantage is that your dentist can easily remove it for cleaning or repairs, which simplifies long-term care.
- Think of ADA Codes as an Itemized Receipt: Each part of your bridge, from the connectors to the artificial teeth, has a specific code. This detailed breakdown tells your insurance company exactly what was done, ensuring accurate billing and helping you understand your treatment plan.
- Be Proactive to Prevent Insurance Surprises: Always ask your dental office to submit a pre-authorization to your insurance provider before starting treatment. This provides a clear estimate of your coverage and is the best way to clarify your out-of-pocket costs ahead of time.
What is a Screw-Retained Implant Bridge?
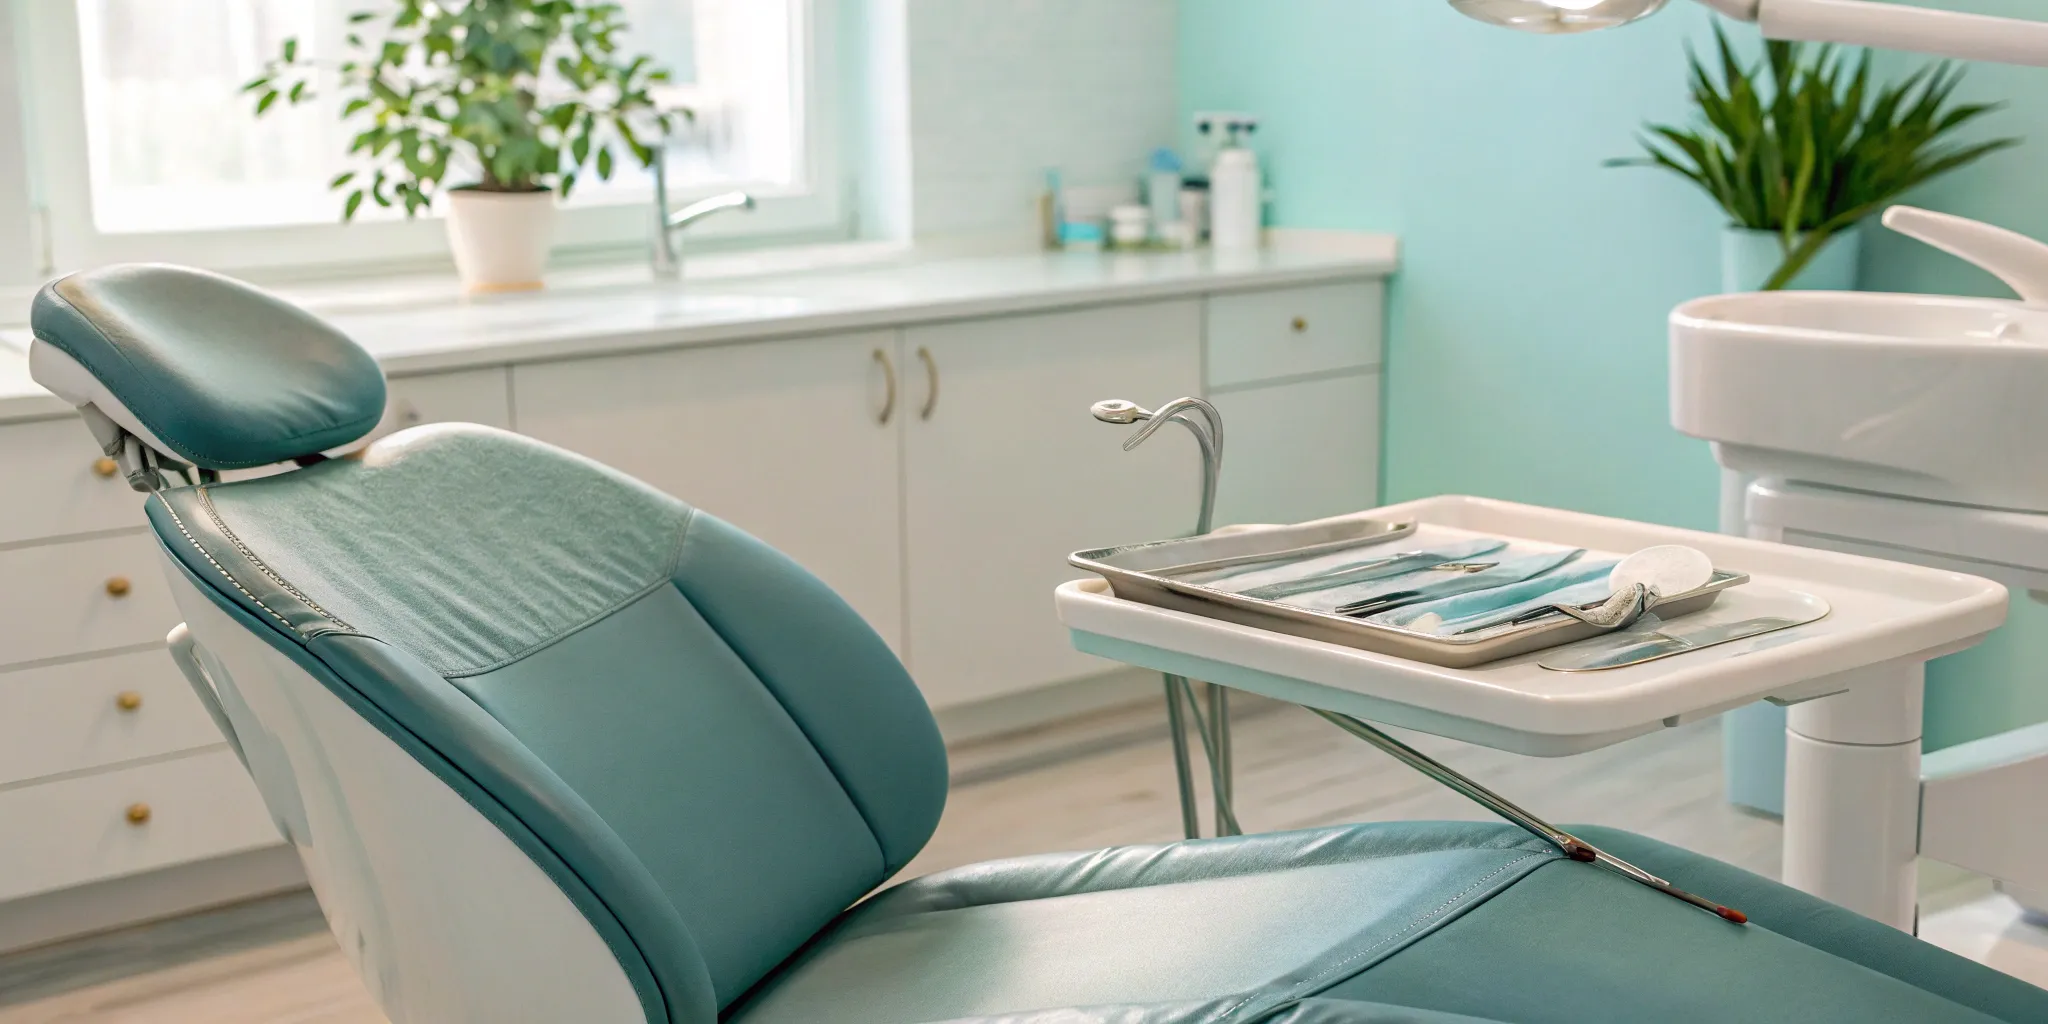
If you’re missing several teeth in a row, a screw-retained implant bridge is a fantastic, permanent solution to restore your smile. Think of it as a single piece that replaces multiple teeth, held securely in place by dental implants. These implants are small titanium posts that act as artificial tooth roots, which are surgically placed into your jawbone.
The bridge itself consists of two main parts: the crowns and the pontics. The crowns are the parts that fit directly over the implants, and the pontics are the artificial teeth that fill the gaps in between. The entire bridge is then secured to the implants with tiny screws that go through the crowns. This creates a stable and durable restoration that looks and feels like your natural teeth. Your dentist will carefully match the color and shape of the bridge to your existing teeth, ensuring a seamless and beautiful result. This approach not only gives you a complete smile but also provides the structural support needed for chewing and speaking confidently.
Screw-Retained vs. Cement-Retained Bridges
When it comes to attaching a bridge to dental implants, there are two primary methods: using screws or using dental cement. A screw-retained bridge, as the name suggests, is attached with small screws. Your dentist can easily access these screws to remove the bridge for cleaning or repairs without damaging it. This makes long-term maintenance much simpler.
A cement-retained bridge, on the other hand, is glued onto the implant abutments, much like a traditional crown. This can sometimes offer a more seamless look since there are no screw access holes. However, a key challenge with cement is the risk of excess material getting trapped below the gumline, which can lead to inflammation or infection. Proper periodontal treatment is crucial to manage any gum-related issues that might arise.
The Advantages of Screw-Retained Bridges
One of the biggest benefits of a screw-retained bridge is its incredible stability. Because it’s anchored directly to implants fused with your jawbone, you can eat, speak, and smile without any of the slipping or discomfort associated with traditional removable dentures. This stability also stimulates the jawbone, helping to prevent the bone loss that naturally occurs when teeth are missing.
Another major advantage is retrievability. If a part of the bridge ever needs to be repaired or a screw needs tightening, your dentist can simply remove the entire piece, fix it, and place it back in. This is a significant benefit for long-term care. Solutions like All-on-4 dental implants often use this screw-retained method to provide patients with a full-arch restoration that is both secure and easy to maintain.
Breaking Down the ADA Codes for Screw-Retained Bridges
When you look at a dental treatment plan, it can feel like you’re trying to read a different language. All those letters and numbers are ADA (American Dental Association) codes, and they’re simply a universal way for dental offices to communicate the specific services you receive to your insurance provider. Understanding the codes for your screw-retained bridge can help you feel more informed about your treatment and how it’s billed. Think of it as an itemized receipt for your dental work. Each part of your dental implant bridge, from the implant connectors to the artificial teeth, has its own unique code.
This system ensures that every detail is accounted for, which is crucial for accurate billing and maximizing your insurance benefits. When we submit a claim, these codes tell your insurance company exactly what materials were used and the specifics of the procedure. It removes any guesswork and creates a standardized record of your care. Knowing what these codes mean can help you follow along with the process and ask targeted questions about your coverage. It’s all about making sure you and your insurance provider have a clear and accurate picture of the excellent care you’re receiving. We believe an informed patient is an empowered one, and demystifying these codes is a big part of that.
The Primary Codes: D6075 & D6076
Let’s start with the main components. The primary codes for a screw-retained bridge refer to the retainers—these are the parts of the bridge that are supported by the dental implants themselves. The specific code used depends on the material we choose for your restoration.
Code D6075 is used for a retainer made of ceramic. This is a great option for a natural, tooth-colored appearance.
Code D6076 is for a retainer made of porcelain fused to metal (PFM). This type combines the strength of a metal base with the aesthetic appeal of a porcelain overlay. These codes are fundamental because they define the foundation of your new bridge.
Coding for Pontics
The “pontic” is the dental term for the artificial tooth in the bridge—it’s the part that fills the gap where your missing tooth used to be. Just like the retainers, pontics are coded based on the material they’re made from. This level of detail ensures your insurance understands the quality and type of restoration you’re getting.
Code D6245 is for a pontic made entirely of porcelain or ceramic, which offers a beautiful, translucent look that mimics a natural tooth.
Code D6240 designates a pontic made of porcelain fused to a precious metal. This provides a durable structure that can withstand significant biting forces, making it a reliable choice for your cosmetic dentistry needs.
Abutment and Crown Coding
An abutment is the small but mighty connector piece that links the dental implant (the part in your jawbone) to the bridge that sits on top. It’s a critical component, and it has its own set of codes.
Code D6056 is for a prefabricated abutment, which is a standard, stock component.
Code D6057 is for a custom-fabricated abutment, which is designed and milled specifically for your unique anatomy.
Additionally, the crowns that are part of the bridge have their own codes, such as D6068 for a ceramic crown and D6069 for a porcelain-fused-to-metal crown. Each code helps build a complete and precise record of your procedure.
Key Factors That Influence Coding
When it comes to dental insurance, the codes used for your procedure are incredibly important. They tell your insurance provider exactly what treatment you received, which directly affects your coverage. For a screw-retained implant bridge, the coding isn’t a simple, one-size-fits-all situation. Several key factors determine which codes appear on your claim, and understanding them can help you make sense of your treatment plan and insurance paperwork.
Think of it like building a custom piece of furniture—the final price depends on the type of wood, the number of shelves, and the complexity of the design. Similarly, the final coding for your bridge depends on the number of teeth being replaced, the materials used to create the bridge, and the overall complexity of your specific case. Each component has its own specific code, and they all come together to paint a full picture for your insurance company. At Harlem Center for Aesthetic Dentistry, we take great care to ensure our coding is precise, reflecting the personalized treatment you receive. This accuracy helps streamline the insurance process and ensures you get the most out of your benefits. Let’s look at the main factors that influence how your implant bridge is coded.
Counting Implants and Pontics
One of the biggest factors in coding is the structure of the bridge itself. When it comes to coding for an implant bridge, it’s essential to consider the number of implants and pontics involved. An implant bridge replaces several missing teeth and utilizes artificial teeth (called pontics) that are anchored by crowns on dental implants. Each of these components—the implants that act as anchors and the pontics that fill the gaps—is coded separately. So, a three-tooth bridge supported by two implants will have different coding than a five-tooth bridge supported by three implants. The more components involved, the more codes will be used on your claim, giving your insurance a clear breakdown of the work performed.
Material and Complexity Considerations
The materials used to make your bridge also play a major role in coding. Different materials have different ADA codes associated with them. For example, a bridge made entirely of porcelain or ceramic will use a different code than one made from porcelain fused to metal. The material you choose for your bridge significantly impacts the total cost and the way it’s coded for insurance. Beyond materials, the overall complexity of your case can introduce additional codes related to your cosmetic dentistry treatment plan. Procedures like bone grafting, which may be necessary to prepare your jaw for implants, will have their own separate codes, ensuring every step of your treatment is accounted for.
Coding for Multi-Unit Bridges
For an implant-supported bridge, the coding varies by material, such as D6075 for porcelain/ceramic or D6076 for PFM. There are three main types of codes for an implant bridge: Abutment-supported retainer codes, Implant-supported retainer codes, and Pontic codes. This means your insurance claim won’t just have one single code for the bridge. Instead, it will be a detailed list that breaks down each part of the restoration. You’ll see separate codes for the pontics (the replacement teeth) and the retainers (the crowns that attach to the implants). This detailed approach is standard for complex procedures like All-on-4 dental implants and ensures every aspect of your treatment is accurately documented for your insurance provider.
Essential Documentation for Insurance Claims
Getting your dental work covered by insurance involves more than just submitting a form. To ensure a smooth process, your dental team needs to provide a complete picture of your treatment. Think of it as telling a story—the more details and evidence we provide, the easier it is for your insurance company to understand why a procedure was necessary and approve your claim. It’s about building a strong case for the care you need.
Clinical Records and X-Rays
When we submit a claim for you, we go beyond just the procedure codes. Your insurance provider needs to see the “why” behind your treatment. That’s why we include detailed clinical notes from your dentist, clear X-rays, and a precise description of the work performed. This documentation substantiates the need for your periodontal treatment or implant, showing it’s essential for your oral health. It’s all about providing clear, compelling evidence to support your claim.
Pre-Authorization Essentials
For more significant procedures, like getting an All-on-4 dental implant bridge, we strongly recommend getting a pre-authorization from your insurance company. This is like getting a quote before you commit. The pre-authorization process confirms exactly what your plan will cover, giving you a clear idea of your out-of-pocket expenses ahead of time. It’s a simple step that helps prevent any financial surprises, so you can move forward with your treatment feeling confident and informed.
Key Patient and Procedure Details
Accuracy is everything when it comes to insurance claims. Even a small error in your information or the procedure codes can lead to delays or denials. Our team is meticulous about using the correct Current Dental Terminology (CDT) codes and ensuring all your patient information is complete and up-to-date. This attention to detail helps your claim get processed efficiently, so you can focus on your recovery instead of paperwork. It’s a crucial part of the comprehensive care we provide.
Clearing Up Common Insurance Misconceptions
Let’s be honest: dental insurance can feel like a puzzle. When you’re considering a significant treatment like a screw-retained implant bridge, understanding what your plan covers is a top priority. It’s completely normal to have questions, and unfortunately, there’s a lot of confusing information out there. Many patients come to us with similar concerns, often based on common myths about how insurance works for restorative procedures.
Our goal is to make this process as clear as possible for you. We believe that when you understand the financial side of your care, you can move forward with confidence. Think of us as your partners in this. We’ll walk you through your treatment plan, help you communicate with your insurance provider, and explain the costs involved. To get started, let’s clear up a few of the most common misconceptions about insurance coverage for dental implants and bridges.
Managing Patient Expectations on Coverage
One of the first questions we often hear is, “Will my insurance cover this?” The answer is usually, “It depends.” While many dental plans now offer some coverage for dental implants, the amount can vary dramatically. It’s rare for a plan to cover the entire cost of the procedure.
Your specific coverage depends on your insurance provider, your individual plan, and even your annual maximums. It’s important to go into the process knowing that some out-of-pocket expense is likely. Our team will help you get a clear picture of what your plan may contribute, so you can plan accordingly and avoid any surprises down the road.
Explaining Out-of-Pocket Costs
The final amount you pay out-of-pocket is directly linked to how your treatment is coded and what your insurance plan agrees to cover. Every procedure, from the implant placement to the final bridge, has a specific ADA code. A simple misunderstanding in how a procedure is coded—like a screw-retained crown, for instance—can affect reimbursement and lead to unexpected costs.
We are meticulous with our coding to accurately reflect the expert cosmetic dentistry you receive. We submit all the necessary documentation to your insurance provider, but the final reimbursement decision is ultimately theirs. We’ll always provide you with a detailed breakdown of your treatment plan and the associated costs upfront.
Pre-Authorization vs. Guaranteed Coverage
Getting a pre-authorization from your insurance company feels like a green light, but it’s crucial to understand what it really means. A pre-authorization is an estimate of what your insurance provider expects to cover for a procedure, not a guarantee of payment. It’s a helpful tool for planning, but it’s not set in stone.
For example, a complex treatment like All-on-4 dental implants may be pre-authorized, but the final coverage could change if your plan’s annual maximum is met or if other clauses apply. We always remind our patients that the pre-authorization is a preliminary step. We’ll help you interpret the estimate and understand any factors that could influence the final payment.
How to Ensure Accurate Coding Every Time
Getting your dental care covered by insurance shouldn’t feel like a puzzle. A huge part of a smooth and predictable insurance process comes down to accurate dental coding. When the codes on your claim perfectly match the treatment you received, it helps prevent delays, denials, and unexpected bills. At Harlem Center for Aesthetic Dentistry, we take this process seriously because we believe clear, accurate billing is a core part of patient care. It’s about more than just numbers; it’s about transparency and trust.
Our approach to ensuring accuracy rests on three key practices that protect you from administrative headaches. First, we stay on top of the constant changes in the dental coding world. The codes used to describe procedures are updated regularly, and keeping current is essential. Second, we believe in meticulous documentation. Every detail of your treatment is recorded clearly and precisely to provide insurance companies with a complete picture of your care. Finally, our experience with complex restorative treatments, including dental implants, means we know the common pitfalls and how to avoid them. By focusing on these areas, we can handle the administrative side of your care efficiently, letting you focus on your healthy smile.
Keep Up with CDT Code Changes
The world of dentistry is always advancing, and the codes used to document procedures, known as Current Dental Terminology (CDT), are updated annually to reflect these changes. Staying current isn’t just good practice; it’s essential for accurate billing. We follow a simple but critical principle: “code what you do.” This means the codes submitted to your insurance must be an exact match for the treatment, materials, and techniques used. Our team dedicates time to training and education on the latest CDT updates to ensure every claim we file is precise. This diligence helps your insurance provider understand the exact nature of your care, leading to a more straightforward reimbursement process.
Document Everything: Best Practices
Accurate documentation is the foundation of a successful insurance claim. Think of it as telling the story of your treatment. To get a claim approved, especially for complex procedures, the insurance company needs a clear and detailed narrative. This includes comprehensive notes from your dentist, high-quality X-rays, and a precise description of the procedure performed. We ensure that every piece of information is complete and correct before submitting a claim. This thoroughness demonstrates the medical necessity of your treatment and is a reflection of the expertise our team of doctors brings to every aspect of your care, from the dental chair to the billing office.
Common Coding Mistakes (and How to Avoid Them)
Dental coding can be complex, and even seasoned professionals can make mistakes. One of the most common misconceptions in the field is how to properly code a screw-retained crown. Simple errors like using the wrong code, submitting an incomplete form, or missing a deadline can lead to a claim being rejected, which costs time and creates unnecessary stress. Our experience in cosmetic dentistry and advanced restorative work means we’ve seen it all. We have robust internal review processes to catch these common errors before a claim is ever sent, ensuring your submission is clean, accurate, and processed as quickly as possible.
Overcoming Reimbursement Challenges
Dealing with dental insurance can feel like a job in itself, but a few key strategies can make the process much smoother. When you understand how to handle denials, communicate effectively with providers, and discuss costs openly, you can feel more in control of your dental care journey. The goal is to ensure that paperwork and miscommunications don’t stand in the way of your treatment. By being proactive and informed, you and your dental team can work together to secure the coverage you’re entitled to for procedures like dental implants and bridges. This approach helps minimize surprises and keeps the focus where it belongs: on your health and your smile.
Handling Denials and Appeals
Receiving a denial from your insurance company can be disheartening, but it’s rarely the final word. Many insurance claims are denied not because the treatment isn’t covered, but because of simple mistakes in coding or paperwork. The first step is to carefully review the Explanation of Benefits (EOB) from your insurer to understand their reasoning. From there, our office can help you check the submitted codes and documentation for any errors. If an error is found, we can resubmit a corrected claim. If the claim is denied again, we can help you file a formal appeal, providing additional clinical notes or X-rays to support the medical necessity of the procedure.
Communicating with Insurance Providers
Clear and proactive communication is your best tool for preventing insurance issues. The goal is to submit a complete and accurate claim the first time to avoid delays and rejections. This starts with pre-authorization, where we send a proposed treatment plan to your insurer before any work begins. This step confirms your benefits and identifies any potential coverage gaps ahead of time. Using the correct codes is vital for your insurance claims to be processed smoothly. Our team is meticulous about documentation, ensuring every detail is accurate so your provider has everything they need to approve your claim for complex cosmetic dentistry procedures.
Talking to Patients About Costs
We believe in full transparency when it comes to the cost of your care. Before any treatment, we will provide a detailed plan that outlines the expected expenses and your estimated out-of-pocket responsibility. The material you choose for your bridge is a big factor in the total cost, which can range from $1,500 to $5,000, depending on the materials and how complex your case is. It’s very important to submit claims correctly to get coverage, and we’ll walk you through how your insurance benefits apply to your specific plan. This open conversation ensures you can make informed decisions about your treatment without worrying about unexpected bills later on.
Related Articles
- Post-Op Care GUIDELINES
- General Dentistry
- All-On-4, All-On-6, All-On-X
- Dental Implants In Harlem
- Cerec
Frequently Asked Questions
Why does one dental bridge need so many different insurance codes? Think of your screw-retained bridge as a custom-built piece of furniture. It’s not just one item; it’s an assembly of different parts. Your insurance claim reflects this by listing separate codes for each component—the implant connectors, the crowns that attach to them, and the artificial teeth that fill the gaps. This detailed breakdown tells your insurance provider exactly what materials were used and how your bridge was constructed, ensuring the billing is precise and transparent.
Is a screw-retained bridge always better than a cement-retained one? Not necessarily, as the best choice really depends on your specific clinical situation. Screw-retained bridges are fantastic because they can be easily removed by your dentist for maintenance or cleaning without any damage. However, a cement-retained bridge can sometimes be a better fit depending on the angle of the implants. We’ll always discuss the pros and cons of each and recommend the option that will give you the most stable, long-lasting, and beautiful result.
What is the most important step to take before starting treatment to manage costs? The single most effective step is to get a pre-authorization from your insurance company. Before we begin any work, our team will submit your complete treatment plan to your insurer. They will review it and send back an estimate of what they expect to cover. This gives you a clear financial picture upfront and helps you plan for any out-of-pocket expenses, minimizing surprises later on.
If my insurance pre-authorizes the bridge, does that mean it’s guaranteed to be paid for? A pre-authorization is an excellent planning tool, but it’s important to know that it’s an estimate, not a guarantee of payment. It confirms that the procedure is a covered benefit under your plan. However, the final amount paid can still be affected by factors like your annual maximum or changes in your coverage. We see it as a crucial step for financial clarity, but not a binding contract.
What should I do if my insurance company denies the claim for my bridge? A denial can be frustrating, but it’s often just a request for more information or the result of a simple clerical error. The first thing we do is review the reason for the denial. Our team can then resubmit the claim with corrected information or provide additional documentation, like X-rays or clinical notes, to support the medical necessity of your treatment. We are here to help you through the appeals process if needed.